
Skip to content
  • Choose your language
    • Português (Brasil)
    • Українська
    • Français
    • Polski
    • Deutsch
    • 中文 (简体)
    • Русский
    • Español
    • Gaeilge
    • العربية‏
    • Türkçe
    • हिंदी
    • اردو
Immigration Service Delivery Logo Immigration Service Delivery Logo Immigration Service Delivery Logo

More results...

  • Home
  • Get Started
    • I would like to come to Ireland to…
      • Visit
      • Work
      • Study
      • Live
      • Join Family
    • I’m in Ireland and I’d like to learn more about…
      • Border controls
      • Registering your immigration permission
      • Becoming a citizen
    • Quick Links
      • My situation has changed since I arrived in Ireland
      • Latest Visa/Preclearance Decisions
      • Residency Calculator
      • International Protection Office
      • International Protection Accommodation Service
      • Glossary of Immigration Terms
  • News and Updates
  • Contact Us
  • Home
  • Get Started
    • I would like to come to Ireland to…
      • Visit
      • Work
      • Study
      • Live
      • Join Family
    • I’m in Ireland and I’d like to learn more about…
      • Border controls
      • Registering your immigration permission
      • Becoming a citizen
    • Quick Links
      • My situation has changed since I arrived in Ireland
      • Latest Visa/Preclearance Decisions
      • Residency Calculator
      • International Protection Office
      • International Protection Accommodation Service
      • Glossary of Immigration Terms
  • News and Updates
  • Contact Us

User guide for the Applicant Representative feature

  1. Home
  2. User guide for the Applicant Representative feature

Applicant Representative feature

The applicant representative feature is part of the Immigration Service Delivery (ISD) Customer Service Portal. It provides a more efficient and secure way for applicant representatives to communicate with ISD digitally on behalf of applicants.

The feature is designed to reduce administrative workload, minimise reliance on hardcopy documents, and provide a clear, centralised view of all communications. It allows registered organisations to maintain member accounts and manage client representation requests, queries and related documents through a single account.

This guide is intended for Organisation Administrators and Organisation Members who are authorised to represent clients and use the portal on behalf of their organisation.

It provides guidance on how to:

• Set up an organisation

• Manage organisation and members

• Represent and manage clients using the new feature

Who is the applicant representative feature for

The applicant representative feature is for legal professionals offering representation services to applicants. Legal firms wishing to use the feature can register for an account with ISD Customer Service.

Through the applicant representative feature organisations can:

• Register their organisation and nominate an initial administrator*.

• Add and manage organisation members and their access permissions.

• Send and manage client representation requests.

• View and download client records, queries and documents linked to their organisation.

• Submit and track support queries relating to their organisation’s use of the portal.

* The organisation’s initial administrator must be a registered solicitor.

Use of the feature is subject to the ISD Customer Service Portal Terms of Use and Privacy Notice, which must be accepted during account activation.

Things to know before you register

Before starting the registration process, make sure you have:

  • access to a computer with internet access;
  • access to your work email (general email accounts cannot be used)
  • a mobile phone that can run the Microsoft Authenticator app; and
  • a registration link (if you haven’t received an invitation to register this can be requested from ISD Customer Service).

Use a computer for the initial registration

Do not complete the initial registration on a mobile phone or tablet. You will need your mobile phone to set up Microsoft Authenticator while using the registration page on a separate device.

You will also need information about the initial organisation administrator and the organisation.

Initial organisation administrator details

  • professional registration number;
  • first name;
  • last name; and
  • individual work email address.

Organisation details

  • organisation name;
  • organisation website, where applicable;
  • whether the organisation is registered with the Law Society of Ireland;
  • whether the organisation has at least one solicitor registered with the Law Society of Ireland; and
  • the number of members in the organisation.

Initial administrator requirement

The initial organisation administrator must be a registered solicitor. This is part of the organisation verification and first-time setup process.

When the organisation later invites users, each person must use an individual email address with the same registered domain name used to set up the organisation.

Choose what you need to do

Register and set up your organisation

Register and set up your organisation

Register your organisation and activate the first administrator account.

Manage your organisation and users

Your Content Goes Here

Invite users, assign administrator access, update details and manage work.

Represent and manage clients

Your Content Goes Here

Add clients, view records, manage queries and documents, and end representation.

Register and Set up your organisation

Register your organisation

Get a registration link

You need a registration link before you can register your organisation. You can get this in two ways:

  • in an Invitation to Register email issued by ISD Customer Service; or
  • by emailing [email protected] to request a registration link.

Complete the registration

  • Open the registration link. You will be taken to the Customer Service Portal sign-in screen. Select Activate Account.
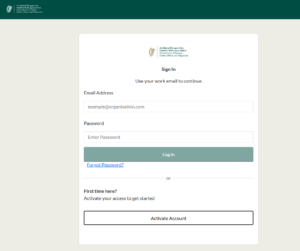
Sign-in screen to begin organisation registration process

  • Enter a work email address that you have easy access to and select Send verification code.
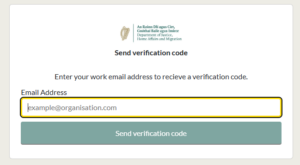
Enter email screen with button to request a verification code

  • Open the verification email and note the code.
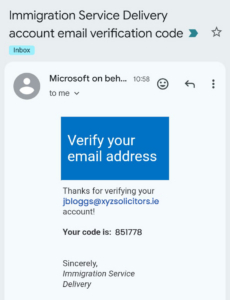
Screengrab of email containing verification code

  • Return to the portal, enter the verification code
  • Step 1: Enter the initial organisation administrator details.
    Please note that the initial administrator must be a registered solicitor.
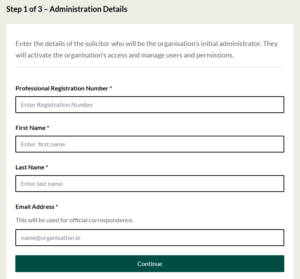
Screenshot of form requesting details of the initial administrator

  • Step 2: Enter your organisation details.
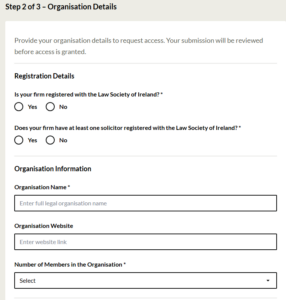
Screenshot of form requesting organisation details

  • Step 3: Review the information and submit the registration request.
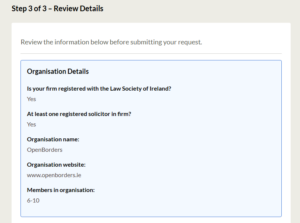
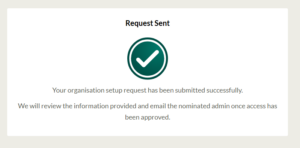
Summary screenshot for review of the details entered with an option to submit Confirmation screen to advise that the request has been sent

What happens after you submit

The ISD Customer Service Team will review the organisation registration request. Once the organisation has been approved, the initial organisation administrator named in the request will receive an email inviting them to register their individual account.

Activate your account and sign in

Use these steps if you are:

  • the initial organisation administrator activating your account after the organisation has been approved;
  • or a user invited to join an organisation that is already registered.

Verify your email address

  • Open the invitation email and select Access Portal/Set Up Account.
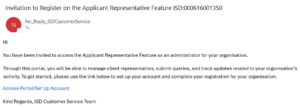
Screenshot of email inviting the initial administrator to register. The email contains a link to setup the account

When you follow the link, you will be prompted to download the Microsoft Authenticator app, a multi-factor authentication tool to protect your account from fraud.

Setting up multi-factor authentication (MFA)

Multi-factor authentication adds an extra security check when you sign in. The portal uses the Microsoft Authenticator app.
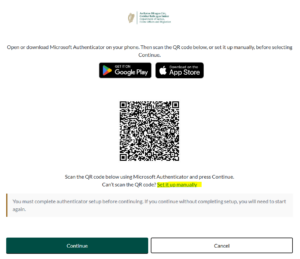

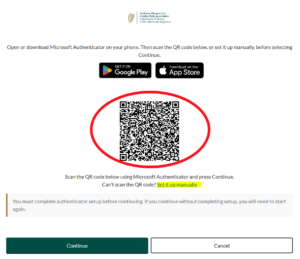
Screen with QR code to download the Microsoft Authenticator applicationGoogle Play and Apple App Store Icons

  • Download the Microsoft Authenticator app from the Apple App Store or Google Play Store if it is not already installed.
  • Open Microsoft Authenticator on your mobile phone.
  • Using your mobile phone, scan the QR code shown on the portal page. If you cannot scan the QR code, select Set it up manually and use the code provided.
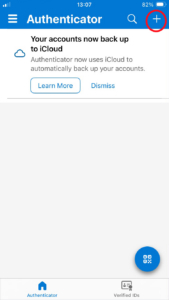
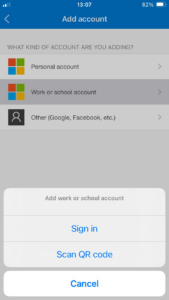
 Screen grab of Microsoft Authenticator app showing how to add an account with the highlighted + symbol located in the top right corner  A second screengrab of the MS Authenticator app presenting the option to sign in or scam a QR code  

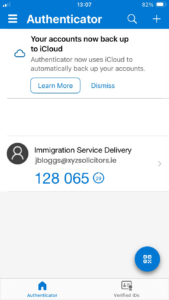
A screengrab of the ISD portal screen showing a QR code circled in red for users to scan to associate with the ISD account A third screengrab of the MS Authenticator app presenting the six digit authenticator code


  • When Microsoft Authenticator begins showing a changing verification code, return to the portal and select Continue.
  • Enter the current code from Microsoft Authenticator and select Verify. Please ensure that you enter the latest code.
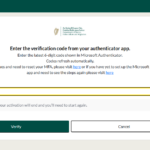
Image of the portal screen where users can enter the authenticator code

Create your password and open the dashboard

You will now be invited to create a password

  • Create and re-enter a password that meets the requirements shown on the screen. Once entered select Activate your account.
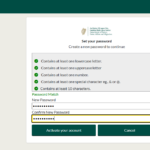
Screen with two fields for users to set their chosen password and confirm that the password is correct

  • Read the Terms of Use and Privacy Notice. Confirm that you agree and select Continue to Dashboard.
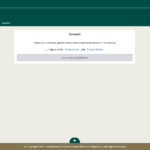
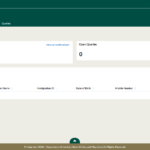
Screen grab requesting the user to consent to the Terms and Conditions and the Privacy Statement

Your account is now active. You will need your email address, password and a newly generated Microsoft Authenticator code for future sign-ins.

Manage your organisation and users

Roles, access and working as a team

Initial organisation administrator

The initial organisation administrator is the registered solicitor named during the organisation registration process. Once the initial organisation administrator has activated their account they can begin setting up the organisation’s users and permissions.

After setup, the initial administrator’s access can be changed in the same way as any other organisation administrator. The organisation can remove or replace the initial administrator.

Organisation administrator

An organisation administrator can:

  • add and remove users;
  • give another user administrator access;
  • remove administrator access;
  • edit organisation details;
  • manage all clients and queries associated with the organisation;
  • reassign work;
  • remove another administrator; and
  • remove or change the initial organisation administrator.

Organisation member

An organisation member is a person invited to use the organisation account. A member may be registered as a solicitor, paralegal or non-qualified person.

User type and administrator access

The user type identifies the person’s role in the organisation. Administrator access is a separate permission. An administrator must select both the correct user type and whether the person should have administrator access.

Use individual work email addresses

Each user must have their own email address. The email address must use the same registered domain name as the organisation i.e. jxsmith@xyzsolicitors.ie.

Following and organisation views

The Following view shows the clients and queries associated with the signed-in user. The Organisation view shows the clients and queries available across the organisation.

Manage your organisation — administrators only

The Administration area is available to organisation administrators. It is used to manage authorised users, assign permissions, manage organisation details and organisation support queries.

Add a user

  • Sign in to your account and then select the Administration tab.
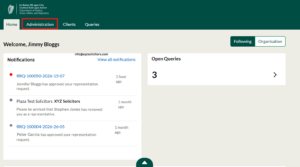
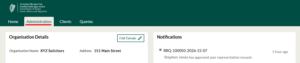
Screen grab of the Dashboard with the Administration tab selected

Select the Authorised Users tab and then select Add User.
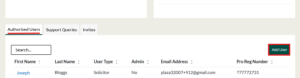
Screen grab of the Authorised Users tab with the add user button selected

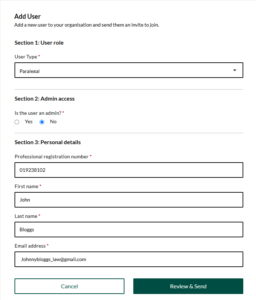
In the Add User tab

  • Section 1 – User role: Select the appropriate User Type.
  • Section 2 – User Access: Choose whether the user should administrator have.
  • Section 3 – User Details: Enter the user’s professional registration number where required, first name, last name and individual work email address.
  • Select Review & Send.

Screengrab of the add user tab

Check the details shown on the confirmation screen. If correct select Send Invite.
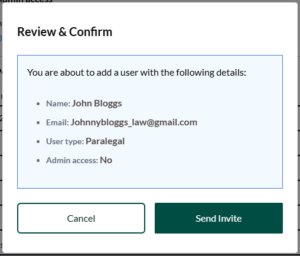
Screen grab of the Review and Confirm screen

The portal will display a success message when the invitation has been sent.

Confirmation of success message to indicate that a new user has been added

Update a user’s details or permissions

  • Open the Administration tab.

Screengrab of Administration tab

In the Authorised Users tab, select the user by choosing their first name.

Screengrab of Authorised Users Tab

  • On the user record, select Edit Details.
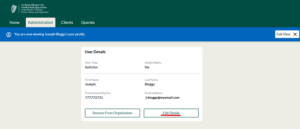
Screengrab of User Record

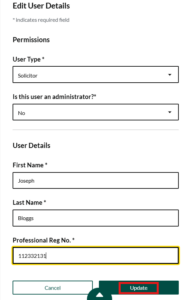
  • Update the User Type, Administrator Access or Personal Details as needed.
  • Select Update.

Screengrab of Edit User Details

Review the changes and select Confirm Changes.
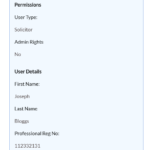
Screengrab of change to user details summary screen

The portal will display a success message when the details have been updated.

Screengrab of portal success message

Remove a user

  • Open the Administration tab.

Screengrab of Administration tab

  • In Authorised Users tab, select the user by choosing their first name.
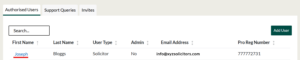
Screengrab of Authorised Users listing

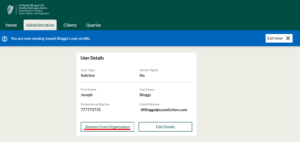
  • Check the blue banner or user record to make sure you have opened the correct user.
  • Select Remove from Organisation.

Screengrab of Administration window with Revoke Access button selected

  • Review any active work shown by the portal.
  • Select Revoke Access to confirm the removal.
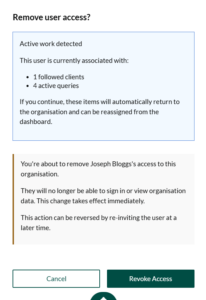
Screengrab of Remove User Access Summary card

A portal message will appear to indicate that the removal has been successful

Screengrab of portal success message

The user will no longer be able to sign in or view organisation information. If the user has active queries, those items will return to the organisation and can be reassigned.

A removed user can be invited again later if they need access restored.

Update the organisation’s details

Open the Administration tab.
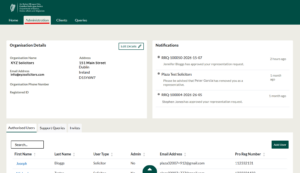
Screengrab of Administration Tab

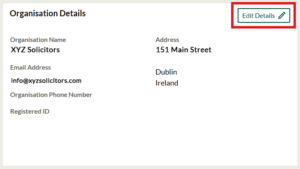
  • Find the Organisation Details or Firm Details section.
  • Select Edit Details.

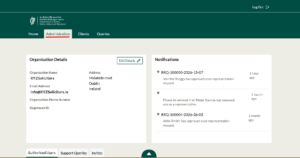
Screengrab of Organisation Details card with Edit Details button selected

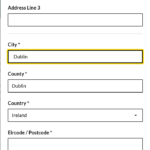
  • Update the organisation phone number or address details as required.
  • Complete all mandatory fields marked with an asterisk.
  • Select Update.

Screengrab of update details tab

Manage clients, queries and work

Organisation administrators can view and manage all clients and queries associated with the organisation and reassign work between users.

Represent and manage clients

Add a client and obtain approval

To add a client, you need the client’s correct Immigration ID. The portal uses this ID to locate the client and send a representation request.

You will need to request the Immigration ID from your client. This is available on the dashboard of the applicant’s ISD Customer Service Portal Account.
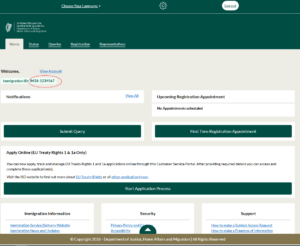
Screengrab of Applicant view of the general ISD Customer Service Portal


To add a client you will have to:

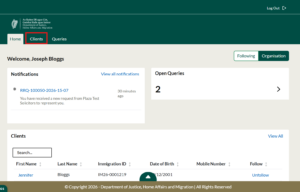
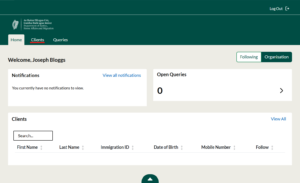
  • Sign in to your account and select the Clients tab.
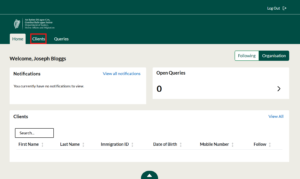
Screengrab of Administration Homepage

Open the Organisation tab then select Add Client.
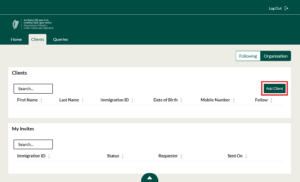
Screengrab of Organisation Tab with add client button selected

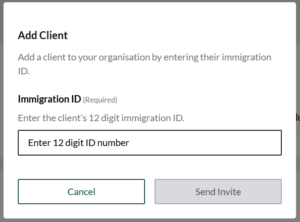
Enter the client’s Immigration ID.

Screengrab of Add Client tab

Check the ID carefully and continue to send the representation request.

Check the Immigration ID

If the Immigration ID contains an error or does not match a record, the portal will display: “An error has occurred. Please review the Immigration ID provided.”

Screengrab of Error message - review immigration ID


An organisation request already exists

If someone in the organisation has already sent a request for the same client, the portal will display: “Your organisation has already submitted a request to represent this client.”


Screengrab of Error Message - organisation request already submitted

The portal will display a success message when the representation request has been sent.

Screengrab of Success Message

Find and manage a client

Find a client

Sign in and select the Clients tab.
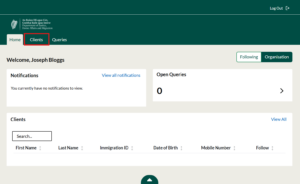
Screengrab of Administration Homepage with Client Tab highlighted

Choose Following to see clients associated with you, or Organisation to see clients associated with the organisation.
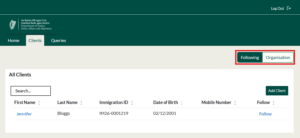
Screengrab of Client tab with Following/Organisation Buttons selected

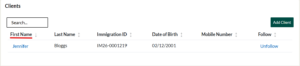
Use the search, sort or filter options to find the client.
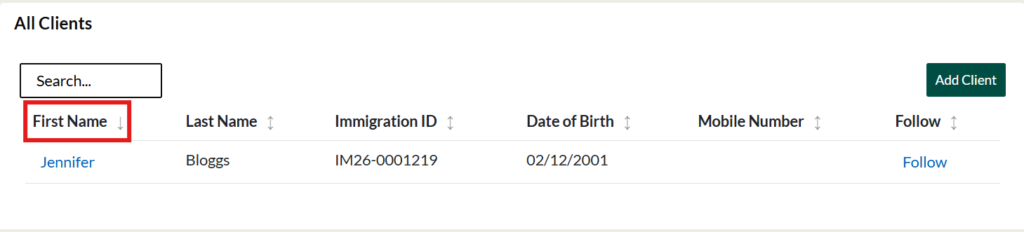
Screengrab of client listing with First Name Column heading selected

The client list can be searched or sorted using information such as:

  • Immigration ID;
  • first name;
  • last name;
  • date of birth;
  • email address; and
  • mobile phone number.

Open the client record

  • Find the client in the list.
  • Select the client’s first name.
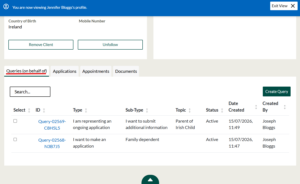
  • Check the blue banner to confirm that you are viewing the correct client profile.
  • The banner will state that you are now viewing the named client’s profile.

Screengrab of Clients banner highlighting profile name

Work with client queries and documents

View queries from the Queries tab

  • Select the Queries tab at the top of the portal.
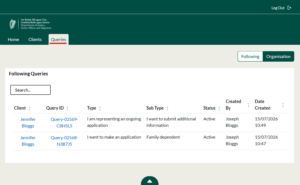
Screengrab of queries tab

  • Choose Following to see queries associated with clients you follow, or Organisation to see all organisation queries.
  • Search, filter or sort the list to find the query.
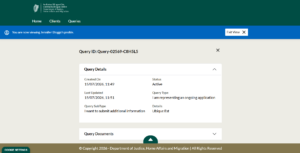
  • Select the client’s name or the Query ID to open the query.
  • The query list may include:

    • client;
    • Query ID;
    • type;
    • sub-type;
    • status;
    • created by; and
    • date created.

Screengrab of Queries Details tab

View queries from a client record

Open the client record.

  • Scroll to the lower card or table.
  • Open Queries (on behalf of).
  • Select the relevant query.

Screengrab of Client Record

Export client queries

  • Open the client record.

Screengrab of Administration Homepage with client tab selected

  • Select the client record you wish to view.
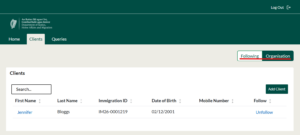
Screengrab of Client tab

Screengrab of Client List with first name column heading selected

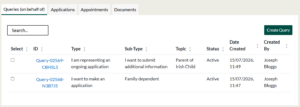
  • Open Queries (on behalf of).

Screengrab of Client Queries

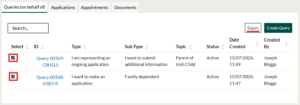
  • Select the button beside each query you want to export.

Screengrab of Clients heading

Screengrab of Queries tab

  • Select Export.
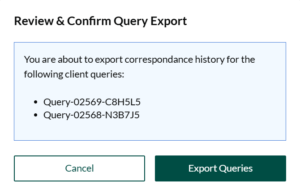
  • Review the confirmation screen.
  • Select Export Queries.

Screengrab of Review and confirm export summary

Preview or download a client document

  • Open the client record.
  • Scroll to the lower card and open the Documents tab.
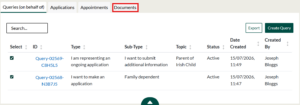
Screengrab of Queries on behalf of tab tab with Documents tab selected

  • Use the Regarding column to see the query connected with each document.
  • Select a Query ID to open the related query.
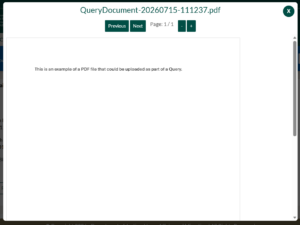
  • Select the file name to preview the document.
  • Select the download icon to download the document.
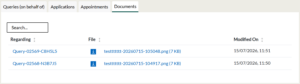
Screengrab of Documents tab

Screengrab of query document screen for export

End a client representation

Removing a client ends the organisation’s access to the client through the Applicant Representative relationship. It does not remove the client’s own Customer Service Portal account. 

To remove a client from your organisation:

  • Sign in and select the Clients tab.

Screengrab of Administration Homepage with clients tab selected

  • Find the client in Following or Organisation tab.
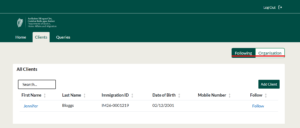
Screengrab of clients tab with organisation/following selected

  • Select the client’s first name to open the client record.
  • Check the profile banner to confirm that you have opened the correct client.
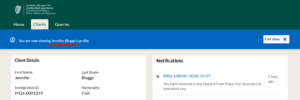
Screengrab of Clients tab

  • In the Client Details card, select Remove Client.
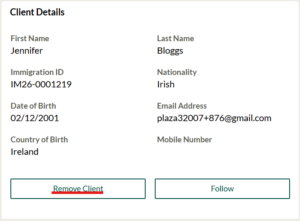
Screengrab of Remove Client Summary Tab

  • If the client has any active items (i.e. Queries, Applications) the system will notify you of these items within this screen. Review any active queries or applications shown on the confirmation screen.
  • Choose the reason for ending the representation.
  • If you select Other, enter the reason in the text box.
  • Review the information and confirm the removal.
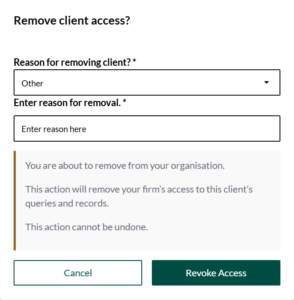
Screengrab of remove Client access details card   

Check active work before removing a client

The portal will show active queries or applications linked with the client before you continue.


Troubleshooting and support

You did not receive a verification code

  • Select Resend Code beside the Submit button. Make sure you are checking the email address used for the invitation.

You cannot scan the Microsoft Authenticator QR code

  • Select the Set it up manually option and use the code shown by the portal.

The Immigration ID is not accepted

  • Check the Immigration ID for errors. The portal will show an error when the ID does not match the information held in the system.

A representation request has already been sent

  • The portal will tell you when the organisation has already submitted a request to represent the client. Check with other organisation users before sending another request.

Request access to register an organisation

  • Email [email protected] to request a registration link.

Raise an organisation support query

  • After signing in, an organisation administrator can open Administration, select Support Queries and create a query. Choose the category and sub-category, describe the issue and attach a relevant file where needed.

Data protection, security and professional responsibilities

The applicant representative feature gives users access to personal and immigration information. Each organisation must manage access carefully and make sure users only carry out work they are authorised to complete.

When using the feature:

  • use your own individual work email address and account;
  • do not share your password, Microsoft Authenticator code or sign-in details;
  • check that you have opened the correct user or client record before making a change;
  • use the correct Immigration ID when sending a representation request;
  • give users only the access they need for their role;
  • update or remove access promptly when a user changes role or leaves the organisation;
  • use the feature only for clients the organisation is authorised to represent;
  • handle exported queries and downloaded documents in line with the organisation’s data-protection and information-security requirements; and
  • read and comply with the portal Terms of Use and Privacy Notice.

Administrator responsibility

Administrator access includes control over users, organisation details, clients, queries and work allocation. Organisations should review administrator access regularly.

Contact Us

Immigration Service Delivery
Department of Justice,
Home Affairs and Migration
13-14 Burgh Quay
Dublin 2 D02 XK70
Ireland

Social Channels

Our Location

Click here to view our location

Useful Links

  • Privacy Policy and Cookies
  • Accessibility
  • Disclaimer
  • Immigration Service Delivery (ISD) Online – Terms and Conditions
  • Immigration Legislation and Policy Guidelines
  • Freedom of Information (FOI)
  • Protecting Personal Data in the Department of Justice, Home Affairs and Migration
  • Sitemap
© Copyright - An Roinn Dlí agus Cirt, Gnóthaí Baile agus Imirce | Department Of Justice, Home Affairs and Migration | All Rights Reserved
FacebookXInstagramPinterest
Page load link
Go to Top